
Litter Robot III - Flashing lights sequentially or flashing all at once
Most of you are here because there are 3 flashing lights on your Litter-Robot's control panel. Sometimes this problem is caused by a faulty power supply or the motor itself. If even after checking the set screw on the motor and checking the voltage on the power supply with a multimeter, the lights are still flashing, you probably need to replace the Hall Effect Sensor.

Note: Before doing this, make sure your globe and its magnets are in good order and well in place.
If the lights on the control panel blink, right to left, left to right or together, the problem is still the same: the robot has failed to track the position of the Earth correctly. That's the purpose of the Hall Effect sensor; it's what makes your Litter-Robot so intelligent. These sensors are designed to respond to any magnetic field. When the globe rotates, the magnets inside the globe trigger the Hall Effect sensor, allowing the Litter-Robot to determine the exact position of the globe.
Follow these steps and you will be able to replace the complete wiring harness without any problems.
Note: The Hall Effect Sensor is part of the wiring harness and is not sold separately.
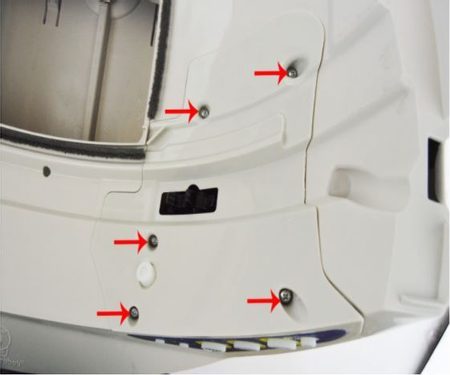
Step 1: Open the Control Panel
- Disconnect the power supply of your Litter-Robot
- Carefully remove the top cover and ball
- Locate the 5 screws at the top of the base and unscrew them
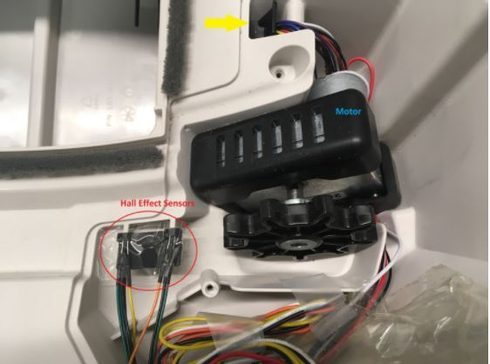
Step 2: Locate the circuit board and sensors
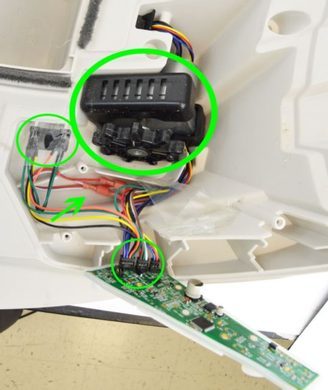
- You should now see the motor, circuit board and Hall Effect sensors
- Carefully disconnect the 3 connectors on the motherboard and remove them
- Disconnect the 2 connectors of the motor and remove it
- Remove the tape from the Hall Effect sensor
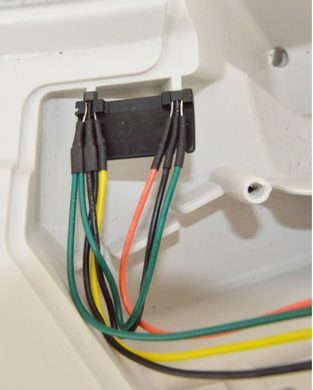
- Locate and remove the cable box (yellow arrow)
Note: The Hall Effect sensor is connected to the wiring harness and you will not be able to remove it now.
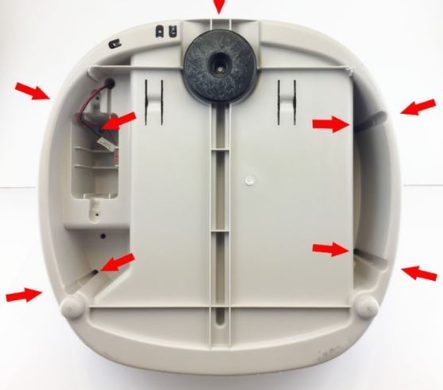
Step 3: Open the base
- Turn the base upside down and make sure there is no loose part left on the control panel
- Unscrew the 9 screws
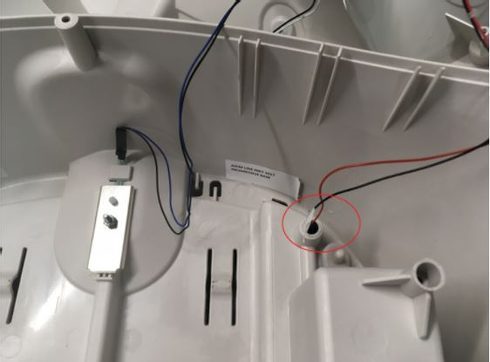
Step 4: Remove the entire wiring harness
- Carefully unscrew the charging connector with pliers (do not lose the nut and washer)
- Disconnect the sensor connector (blue and black wires)
- Disconnect the hood wires (purple and black wires)
- Carefully remove the battery wires (red and black wires)


Step 5: Install the new wiring harness
- Reconnect the sensor (blue and black wires)
- Pull the battery connectors through the small hole (red and black wires)
- Screw back the power connector (white and black wires)
- Plug back the hood connectors (purple and black wires)
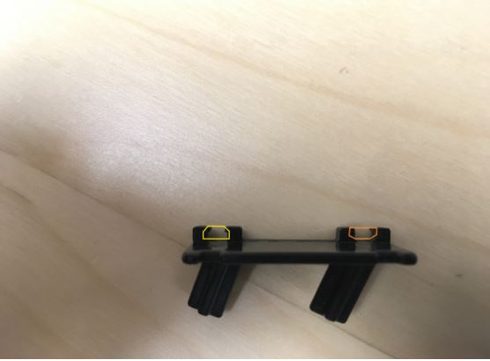
- Push the Hall Effect sensor through the hole in the control panel
Verify the installation of the Hall Effect sensors in the plastic wiring:
Step 6: Reinstall the control panel
- Make sure all wires are under the motor
- Snap the wire box back into place
- Mount the motor (wiring: red with green, white with brown)
- Fit the plastic part with the Hall Effect sensor into place
- Add a piece of tape to the Hall Effect sensor and secure it
- Add the plug back to the 3 connectors on the circuit board
Step 7: Close the unit back
- Aattach the main board to the plastic panel
- Screw back the 5 screws (make sure all wires are locked in place and not disconnected in the process)
- Screw back the 9 screws in the back of the base
Step 8: Connect it and test
- Once the unit is reassembled, reinstall the globe (double check that the motor gear is properly seated in the globe groove)
- Snap on the hood
- Connect the power supply
- If the unit does not turn on automatically, press the power button
- Allow the unit to cycle
- Enjoy the repaired unit